Tuesday, 14 January 2025

How to get a Professional or Customised Email Address for Your Business


Get Your Dream Email Address: The Ultimate Guide to a Professional Email Address or Custom Email Address


Did you know that 70% of consumers trust a business more if it has a professional email address? In a world where first impressions matter, having a custom email can make all the difference. A personalized email address (professional email address or custom email address) not only enhances your brand image but also increases trust among clients and contacts.

This guide will walk you through the steps of obtaining a professional email address or custom email address and show you how to maximize its impact.


Choosing the Right Custom Email Provider


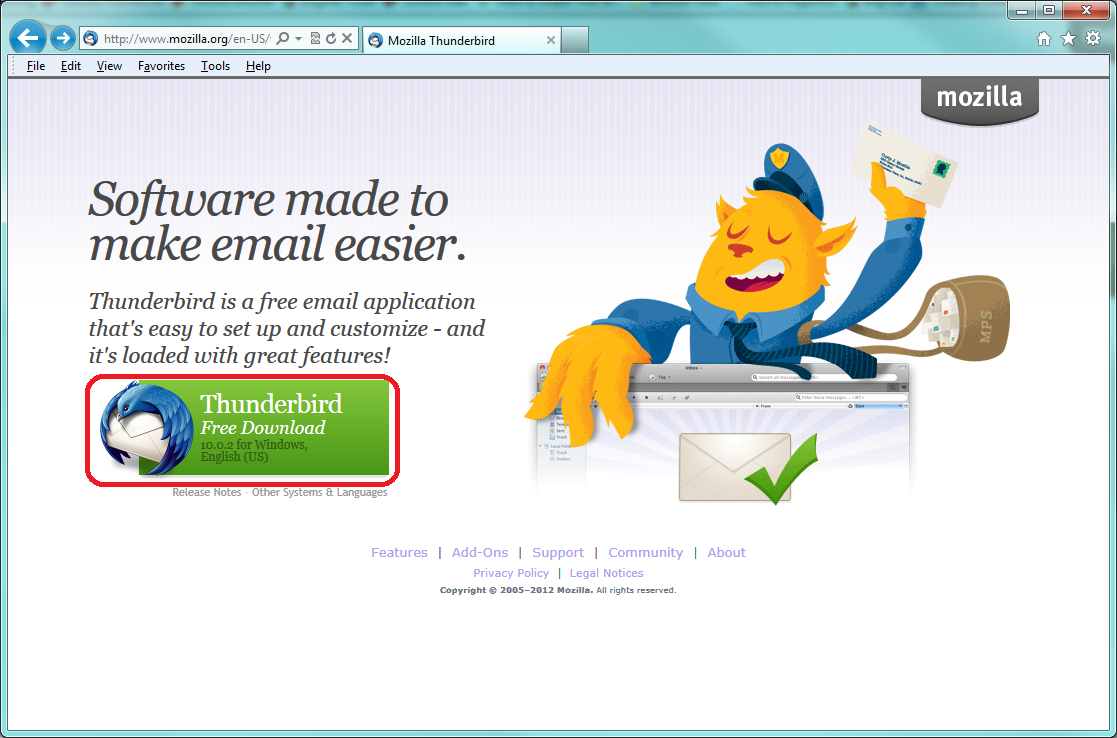
Free services like Gmail and Outlook are great for personal use. However, paid services like PIGEON COOP HOSTING offer more benefits for businesses, like custom domains, enhanced security, and better support.


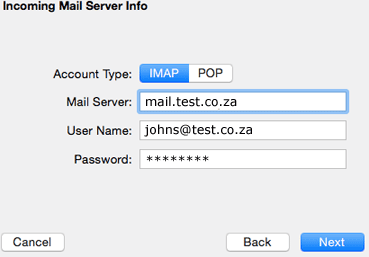
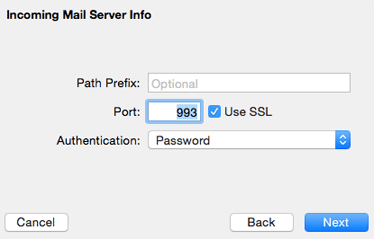
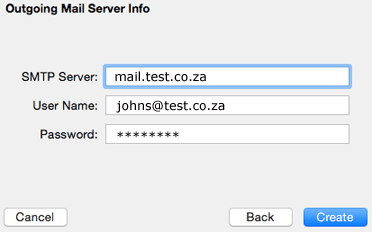
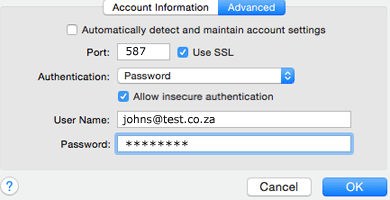
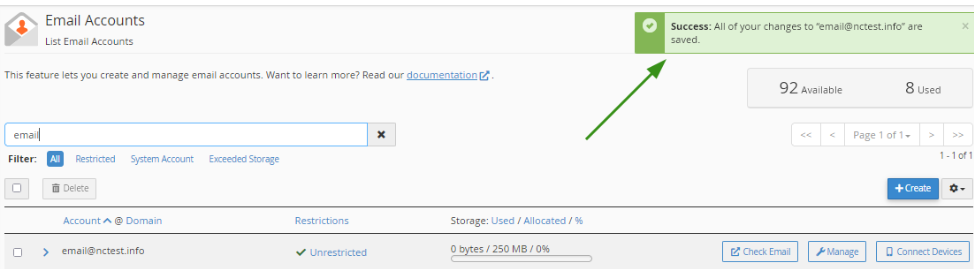
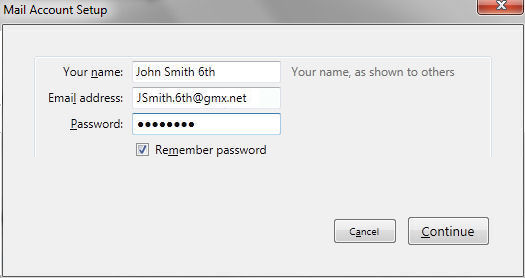
Considering Domain Name Registration


A custom email address typically includes your domain name (e.g., yourname@yourbusiness.com). To get a custom email, registering a domain is crucial. You can do this through domain registrars like PIGEON COOP HOSTING

The process is straightforward:
  1. Decide on your unique domain name. e.g yourbusiness.com
  2. Check its availability or ask Pigeon Coop Hosting to do a Free search for you.
  3. Complete the registration.
  4. Link your domain to your email service.


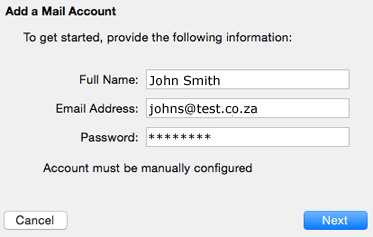
Designing a Professional Email Address


Choosing the Right Domain Name

A memorable domain name is vital for a professional email or custom email address. 

Here are some tips:

  • Keep it short and simple.
  • Avoid numbers and special characters.
  • Use relevant keywords.


Crafting a Professional Email Address Format

Select a format that’s easy to read. Good examples include:


Avoid formats like crazyguy123@ or cute.kitty@, which can look unprofessional.


Avoiding Common Email Address Mistakes


Steer clear of common pitfalls:

  • Don’t use nicknames.
  • Avoid unprofessional phrases.
  • Refrain from using excessive numbers or fun characters.


Leveraging Your Custom Email for Success


Utilizing Your Custom Email for Business

A professional email address or custom email address fosters trust. Studies show that customers are 70% more likely to engage with a business that uses a branded email. This impacts networking positively and builds confidence with clients.


Personal Branding and Custom Emails

Your email address reflects your brand. A consistent format across platforms strengthens your brand image. Ensure your custom email aligns with your overall branding strategy.


Securing Your Custom Email

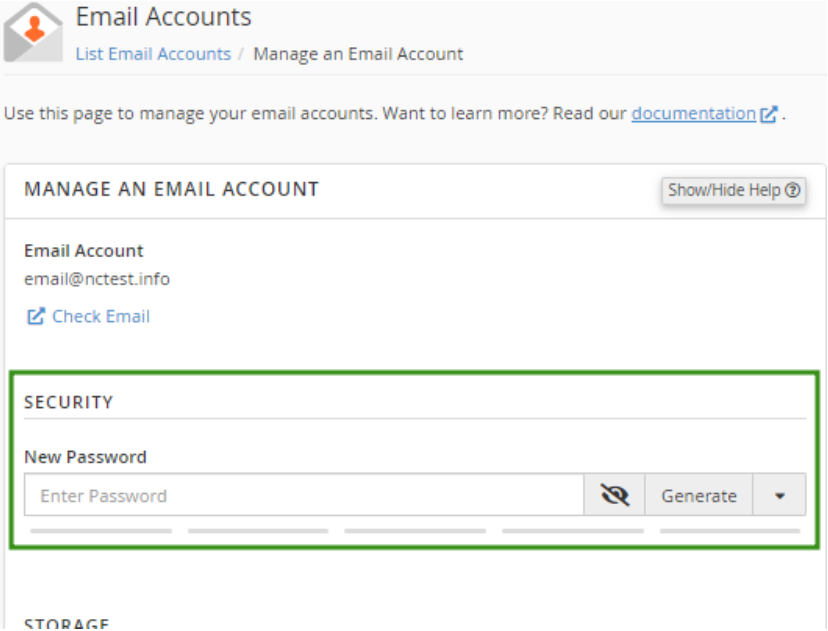
Protect your email address with strong passwords and two-factor authentication. Cybersecurity expert Jane Doe states, "A strong, unique password is your first line of defense against hackers." Regularly update your security settings to minimize risk.


Updating and Managing Your Custom Email


To manage your email efficiently:

  • Change your password regularly.
  • Update your forwarding settings if you change addresses.
  • Keep your contact information current.


Conclusion


Obtaining and managing a custom email address is a straightforward process. It significantly boosts trust and professionalism in your communications. Start creating your own custom email address today and experience the long-term benefits it brings.


To get more information about this article, contact:


How to change your email password in cPanel or Webmail


How to do you change your email account password in the cPanel or Webmail.

Password change tips:
  • Your password must be at least 8 characters and contain at least 1 uppercase character, 1 lowercase character, and 1 number.
  • Use a combination of 8+ characters for a strong password.
  • Your mailbox password cannot contain spaces or the following characters: \, &, +, '.
  • These characters can be used: [a-zA-Z0-9#!@$%^*()_="?.,/;:<>`{|}~-[]].


Log in to your cPanel.

Your cPanel login credetials must've been sent to you when you registered your Domain.
If not, then ask your service provider for your cPanel login credentials.


ONCE YOUR HAVE LOGGED IN.

1. Navigate to the "Email Accounts" menu.


2. Find the necessary email address, and click the "Manage" option.


3. Navigate to the "Security" field and enter a new password. 
Alternatively, you can use the Generate option to create a password.


4. Click "Update Email Settings" to save the changes.


Once the changes are saved, you’ll see a confirmation message at the top of the page.


Success!


Thursday, 5 December 2024

How to Avoid Phishing Scams


A Comprehensive Guide to Online Safety


In 2022 alone, phishing scams cost victims over $52 million (USD). Such staggering losses highlight the need to stay vigilant. Phishing is a deceitful way scammers trick individuals into sharing sensitive information. It can show up as emails, texts, or even messages on social media. Staying one step ahead is crucial for your online safety.

Identify and Avoid Suspicious Emails


Subject Line Analysis

Phishing emails often have eye-catching subject lines designed to provoke an immediate response. 
Look for common traits like:

  • Urgency: "Act Now: Your Account Will Be Closed!"
  • Threats: "Your Payment is Overdue!"
  • Too Good to Be True: "You've Won a R1000 Gift Card!"

Sender Address Verification

Always check the sender's email address. Scammers might use an address that looks similar to a legitimate one. For example, instead of "yourbank.com," they might use "yourbadk.com." To verify:

  • Hover over the sender's name to see the full address.
  • Cross-check any unfamiliar domains.

Unusual Language and Tone

Be wary of emails that use casual language or have many grammatical mistakes. Legitimate companies usually maintain a professional tone. Examples of poorly written phishing emails include:
  • "Hi there! Your account needs continuting security."
  • "Dear user, your acount is being flagged."


Recognize Phishing Websites

URL Inspection

A common trick is to create fake websites that look real. Always check for:

  • Misspellings: Be cautious of URLs with typos.
  • Suspicious Domains: Pay attention to .com.co or .net domains instead of .com.

For example, a URL like "www.pigeoncoop.co.za" is legitimate, while "www.pigeoncuop.co.za" is a red flag.


Suspicious Pop-ups and Requests

Pop-ups that request personal information unexpectedly are always a warning sign. Legitimate sites rarely ask for sensitive data via pop-ups.

Protect Your Accounts and Data

Strong Passwords and Multi-Factor Authentication

Use strong, unique passwords for all accounts and enable multi-factor authentication. Recommended tools for password management include:

  • LastPass
  • Dashlane
  • 1Password

Software Updates

Keep your software and operating systems updated. Many updates fix known security vulnerabilities. Did you know that around 30% of security breaches happen due to outdated software?


Suspicious Links and Attachments

Avoid clicking unknown links or downloading attachments from unfamiliar sources. Even trusted contacts can be hacked.


Educate Yourself and Others

Phishing Awareness Training

Ongoing education is vital. Websites like StaySafeOnline.org and Phishing.org offer helpful resources to help you spot phishing scams.

Reporting Phishing Attempts

If you encounter phishing emails, report them. Use sites like:

  • ReportPhishing.com
  • SpamCop.net

Share Knowledge

Talk to your family and friends about phishing scams. The more people know, the safer everyone becomes.


The Role of Anti-Phishing Software and Tools

Antivirus and Anti-malware Software

Reliable antivirus software can help identify and block phishing attempts. Some reputable brands include:
  • Norton
  • McAfee
  • Bitdefender

Email Filtering

Email filters automatically flag or send suspicious emails to the junk folder, reducing the chances of falling victim.


Browser Extensions

Browser extensions like Web of Trust (WOT) or Netcraft can warn you about potentially harmful sites, enhancing your protection against phishing.

Conclusion

Recognizing and avoiding phishing scams is essential for online safety. Stay alert and proactive with identified suspicious emails, safeguard your accounts with strong passwords, and educate yourself and your community. Practice safe online habits. The internet can be a wonderful place; let's keep it safe!


To get more information about this article, contact:


Thursday, 9 May 2024

Benefits of Having a Professional Email for your Business


Introduction

In today's digital age, businesses are increasingly relying on email communication to connect with clients, partners, and employees. While it may be tempting to use a generic email service for business purposes, there are significant advantages to having a professional business email address.

Establishes Credibility


When you use a professional business email address, such as yourname@yourbusiness.com, it immediately instills a sense of credibility and professionalism. It shows that you are serious about your business and are willing to invest in a professional image. In contrast, using a generic email address from a free service can give the impression that your business is not established or lacks attention to detail.

Builds Brand Awareness

Having a business email address that includes your business name reinforces your brand with every email you send. This constant exposure helps to build brand recognition and awareness among your recipients. It also serves as free advertising, as every time you send an email, you are promoting your business.

Enhances Security


Professional business email addresses often come with enhanced security features, such as encryption and advanced spam filtering. This helps to protect sensitive business information and reduce the risk of data breaches. Additionally, having a dedicated business email address separates your business communication from personal correspondence, reducing the likelihood of security issues.

Facilitates Customer Trust


When customers receive an email from a professional business email address, they are more likely to trust the legitimacy of the sender. This is especially important when dealing with sensitive information or financial transactions. A professional email address can help to reassure customers that they are communicating with a legitimate business entity.

Improves Email Deliverability


Using a professional business email address can positively impact your email deliverability rates. Many free email services have strict spam filters that may flag or block business-related emails. By using a professional email address, you can increase the chances of your emails reaching the intended recipients' inboxes.

Conclusion


In conclusion, the benefits of having a professional business email address are undeniable. From establishing credibility and building brand awareness to enhancing security and customer trust, the advantages extend far beyond simple email communication. By investing in a professional business email address, you are investing in the long-term success and reputation of your business.


To get more information about this article, contact:


Tuesday, 30 January 2024

How to Install Thunderbird and Setup your Email for Windows


WHAT IS THUNDERBIRD?

Software made to make email easier.

Thunderbird is a free and open source email, newsfeed, chat, and calendaring client, that’s easy to set up and customise. One of the core principles of Thunderbird is the use and promotion of open standards - this focus is a rejection of our world of closed platforms and services that can’t communicate with each other. We want our users to have freedom and choice in how they communicate.


1. Download Mozilla Thunderbird by clicking on this link, then follow the installation instructions provider below.

Or download from here: https://www.thunderbird.net/en-GB/


The page will automatically recommend the best version(s) of Thunderbird for you.


2. Click on the green download link to download the Thunderbird installer. 


Depending on your connection speed, the download may take up to a few minutes. 
Thanks for your patience… it’ll be worth the wait!


3. Start the process by clicking Run.


4. Then, just follow the steps (we’ve made the process as painless as possible).


Congratulations, you are done installing Thunderbird!


Double-click on the Thunderbird icon whenever you want to communicate.


* * *

SETTING UP YOUR EMAIL ACCOUNT ON THUNDERBIRD AUTOMATICALLY


Setting up a new account with Thunderbird is easy. All you need to do is... 


1. Provide your user name and password for your email provider and your email address.

The first time you open Thunderbird after installing, you are prompted to create a profile. 
(At this stage close any windows that propose to set up an email service and carry on)

Next you will be asked to provide details about your email account in the dialog box shown below.


When you click Continue, Thunderbird will look up the email provider and attempt to determine the server settings. Then automatically connect your email account.


Another way to add a new account is to click on an existing account name (the displayed email address). 

1. Under the "Accounts" heading there are two options: 

2. "View settings for this account" and "Create a new account" or "Set up an account".

3. Under "Create a new account" or "Set up an account", click "Email" to display the dialog box shown below.

4. Again enter your username and password as shown below.


When you click Continue, Thunderbird will look up the email provider and attempt to determine the server settings. Then automatically connect your email account.


After creating the account, Thunderbird will display the new account:


If your account cannot be automatically configured by Thunderbird, you must manually configure it. This is done via the Account Settings dialog, accessed from the Tools menu. Your email account provider can provide details on connection information.


To get more information about this article, contact:


Friday, 26 January 2024

Download and Install the BlueMail App for your Android


BlueMail download and configuration settings


Before you download the app for installation, please familiarise yourself with the setup instructions below:

Click on the link below to download:
https://play.google.com/store/apps/details?id=me.bluemail.mail

After installing the app on your cellphone:
  1. Open the app.
  2. Click on Add Account.
  3. Select Other Email from the options listed.
  4. Enter your new email address/username.
  5. Enter your new password.

You're DONE. Now you're ready to use the app.


To get more information about this article, contact:


How to Set Up a Signature in Webmail Roundcube


Configure a signature in Roundcube

To create an email signature in the Roundcube Webmail client, follow these steps:
  1. Log in to Roundcube.
  2. In the side menu bar, click Settings.
  3. In the first panel, click Identities.
  4. Select the existing identity, or click Create to create a new identity.
  5. In the Signature text box, enter the desired signature.
  6. Click Save.

Add an image to your signature in Roundcube

If you wish to add an image to your signature in the Roundcube Webmail client, follow these steps:
  1. Follow steps 1-4 in the procedure referenced above.
  2. In the upper lefthand corner of the Signature box, click the HTML editor icon ().
  3. In the toolbar, click the insert/edit image icon ().
  4. In the Insert/edit image window, click the folder icon ().
  5. Click Add image.
  6. Select the image file to upload.
Note:
  • The image file size must be smaller than the maximum allowed file size displayed in the interface.
  • The image file must be in JPEG or GIF format.
NEXT:
  1. In the bottom righthand corner, click Close.
  2. In the Select filename window, click the image name.
  3. Enter the desired dimensions for the image.
  4. Click OK.
  5. Underneath the Signature box, click Save.

Important:

The image only appears in the signature if you use the HTML editor to compose messages.

This usually comes already setup by the service provider, but to compose all messages with HTML in Roundcube, you can follow these steps:
  1. Go to Settings » Preferences » Composing Messages.
  2. Under the Main Options setting, in the Compose HTML messages menu, select always.
  3. Click Save.

WHERE TO FIND YOUR WEBMAIL ROUNDCUDE IN THE CONTROL PANEL

Login to your cPanel » Home » Email Accounts » Check Email 

When it shows up, click on the blue Open button. 


To get more information about this article, contact:


Tuesday, 23 January 2024

How to Upload the HTML and CSS file to cPanel

In this guide, we have explained how to upload the HTML and CSS files to cPanel. Two of the primary technologies for creating Web pages are HTML (the Hypertext Markup Language) and CSS (Cascading Style Sheets). 

For a range of devices, HTML provides the page structure while CSS handles the (visual and auditory) layout.


Let us follow the steps:

1. Log in to cPanel.


2. Select the “File Manager” option under the “Files” category.


3. Your website can be published using File Manager. Find “public_html” by searching in the file manager’s left sidebar.


4. Publish “index.html” and any additional source files you want to public_html”.


5. Click on the link back to /home/customer/public_html after the uploading is done.

6. You can find your uploaded files in the File manager.

In such a manner you can upload the HTML and CSS files to cPanel.


To get more information about this article, contact:


Thursday, 11 January 2024

How to Manage your Emails More Effectively


Streamlining Your Email Management Process for Increased Productivity

Introduction:

In today's digital age, emails have become an integral part of our professional lives. While emails offer convenience and ease of communication, they can also create a sense of overwhelm and hinder productivity if not effectively managed. With the increasing volume of emails we receive daily, mastering the art of managing your inbox is crucial for staying organized and efficient. In this article, we will explore effective strategies to help you handle your emails more effectively.

1. Set Clear Email Objectives:

Before diving into your inbox, establish a clear purpose for your email management efforts. Assess what you aim to achieve with each email session, be it prioritizing important messages, responding promptly, or reducing clutter. Setting concrete objectives will help you approach your inbox with a purposeful mindset, ensuring that you stay focused and achieve your goals.

2. Create an Organized Folder Structure:

To maintain a well-organized inbox, create a folder structure that aligns with your specific needs. Designate folders for different categories such as work-related, personal, subscriptions, and archives. Develop a systematic labeling system or use flags to mark important or time-sensitive emails. This classification will help you quickly locate specific messages, eliminate clutter, and improve overall efficiency.

3. Practice the "Four D's" Technique:

To streamline your inbox, apply the "Four D's" technique to every email you receive: delete, delegate, do, or defer. Delete irrelevant or unnecessary messages as soon as possible to declutter your inbox. Delegate tasks to appropriate team members if they are better suited to handle them. For urgent or quick-to-complete emails, take immediate action and do them. For more complex or time-consuming tasks, defer them to a set time slot in your schedule.

4. Utilize Email Filters and Automation:

Email filters and automation can be powerful tools in managing your inbox efficiently. Set up rules and filters that automatically sort incoming emails into relevant folders or apply specific labels based on predetermined criteria. This will help you prioritize and organize your messages without spending unnecessary time sorting through them manually. Moreover, utilize tools like email templates or canned responses to automate repetitive responses, saving valuable time.

5. Adopt the Two-Minute Rule:

To prevent emails from piling up, commit to the two-minute rule. If the email requires two minutes or less to respond, take immediate action rather than postponing it. By promptly addressing quick tasks, you avoid accumulating a backlog of small yet time-consuming emails that can impede your productivity.

6. Set Email Boundaries:

Establishing clear boundaries around your email usage is vital to managing your inbox effectively. Schedule dedicated time slots for checking and responding to emails, rather than continuously interrupting your workflow to address incoming messages. By limiting your email access to specific intervals, you can maintain better focus on your core tasks and reduce the likelihood of distractions. Communicate these boundaries with colleagues and clients to manage their expectations regarding response times.

7. Embrace the Power of Unsubscribe:

An overwhelming influx of promotional emails or newsletters can quickly clutter your inbox. Take control by unsubscribing from irrelevant or unwanted subscriptions. Aim to streamline your email subscriptions to those that genuinely provide value or directly contribute to your professional growth. This deliberate reduction will ensure a less cluttered inbox, improved productivity, and increased email engagement.

Conclusion:

Effectively managing your emails is not only about staying organized; it also contributes to your overall productivity and well-being. By implementing these strategies, setting clear objectives, organizing your folders, leveraging automation, and adhering to email boundaries, you can regain control over your inbox and optimize your daily workflow. Remember, the goal is to be proactive rather than reactive when it comes to email management. With the right mindset and techniques, you can navigate through your inbox with efficiency, freeing up valuable time for your core responsibilities and achieving peak professional performance.


To get more information about this article, contact:


Wednesday, 10 January 2024

How to Setup your New Email Account on your Apple Mac


This tutorial will guide you through setting up a New Email Account on your Apple Mac, or adding an additional email account.

1. Open Mail

2. Select Add Account - Should this be the first email account you are setting up on your Mac, then it will automatically redirect you to the Add Account window

3. Select Add Other Mail Account - at the end of the default list that is displayed.

4. Click Continue

5. Enter the following information:

Full Name: the name you wish to have displayed as Sender

Email Address:
the email address you have setup with your ISP

Password: the one relevant to the above email address


6. Click Next

7. You will receive an Account must be manually configured message - because Mail will attempt to contact the mail default server, which will not work.

8. Click Next

9. Enter the following information for the Incoming Mail Server:

Mail Server: mail.yourdomainname.co.za (as sent through by Pigeon Coop Hosting, or your IP address)

User Name: this will be your email address

Password: your email password


10. Click Next

11. Incoming Mail Server additional details

Path Prefix: leave this text block blank

Port: this will be based on the settings you have selected as:

IMAP: 143 (if you are using SSL then 993)
POP3: 110 (if you are using SSL then 995)

NOTE - SSL Checkbox: Tick this box if you wish to connect SSL encryption. 
Please use the SSL Port as indicated above.

Authentication: must be Password - select from the drop-down menu

12. Click Next


13. Enter the following information for the Outgoing Mail Server:

SMTP Server: mail.yourdomainname.co.za (as sent through by Pigeon Coop Hosting, or your IP address)

User Name: this will be your email address

Password: your email password

14. Click Create


15. On the Mail menu, select Preferences

16. Select Accounts tab

17. Select the your new email account from the left-hand column

18. Select Advanced tab

19. Uncheck Automatically detect and maintain account settings

20. Navigate back to Accounts tab

21. From the Outgoing Mail Server (SMTP) drop down menu - select Edit SMTP Server List

22. Select Advanced tab

23. Uncheck Automatically detect and maintain account settings

24. Port: it is highly recommended to use 587 (without SSL or 465 with SSL) as many ISPs block the default port 25

25. Authentication: select Password from the drop-down menu

26. Check Allow insecure authentication

NOTE: if you do not see this option, you may have to update Apple Mail or Yosemite to the latest version


27. Click OK


To get more information about this article, contact: